Guide to Create a Shared Mailbox in Office 365
An employee of an organization gets a dedicated email ID to use it for business communication. But there are some email IDs which are specifically designed for some official purposes, like contact@yourcompanyname.com, info@yourcompanyname.com, careers@yourcompanyname.com, or complain@yourcompanyname.com.
All these email IDs get a lot of emails, and a single person cannot manage such large amount of mails. So, it is required that multiple users work collectively on them. In Exchange Server or Exchange Online, these shared email IDs are known as shared mailboxes, and several users can receive and send email from the shared mailboxes. The benefit of using a shared mailbox is that when a user replies to a specific email, then the sender will receive the message on behalf of the shared mailbox and not from the user’s mailbox.
Shared mailbox also has a shared calendar where each member can input their appointments. So, if you want to have a meeting with your team member, then you can check the calendar and see when that member is free.
Let’s see the step-by-step process of creating a new shared mailbox in Office 365 and adding members to it.
Create a Shared Mailbox in Office 365 Admin Center
Step 1) First, log in to Office 365 Admin Center using the administrator credentials. Click the Admin option in the Apps menu.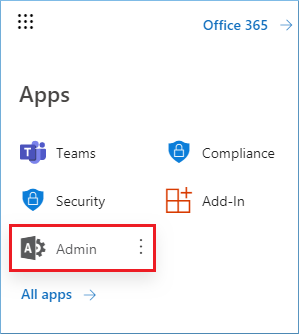
Step 2) Under Groups, click shared mailboxes.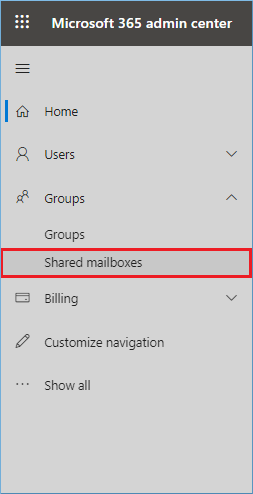
Step 3) Here, click ‘Shared mailbox’ button.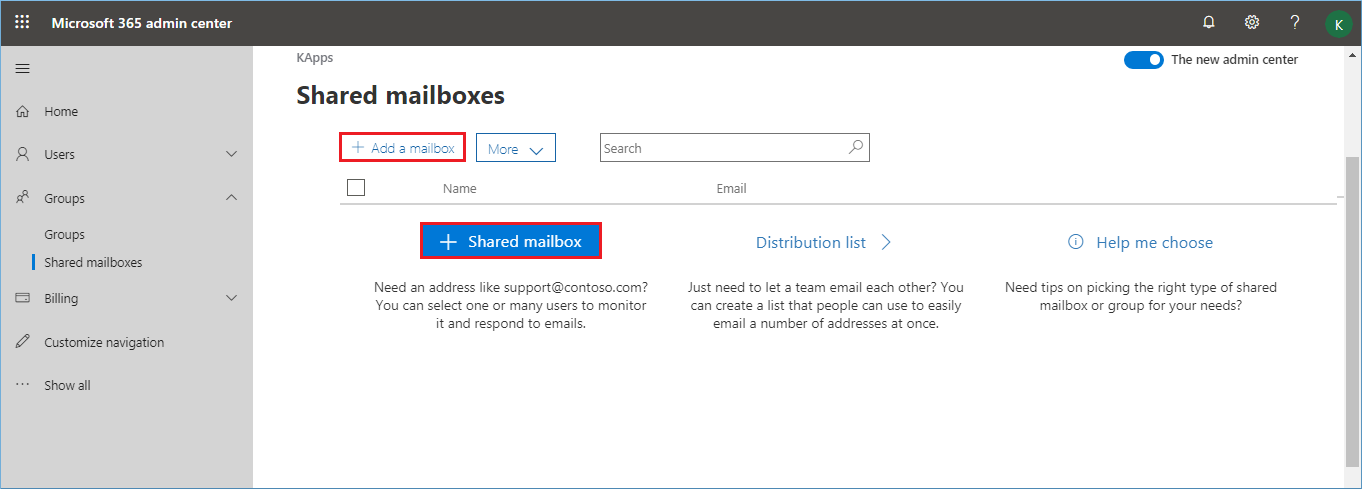
Step 4) Provide a name to the shared mailbox and give an email account.
Finally, click Add.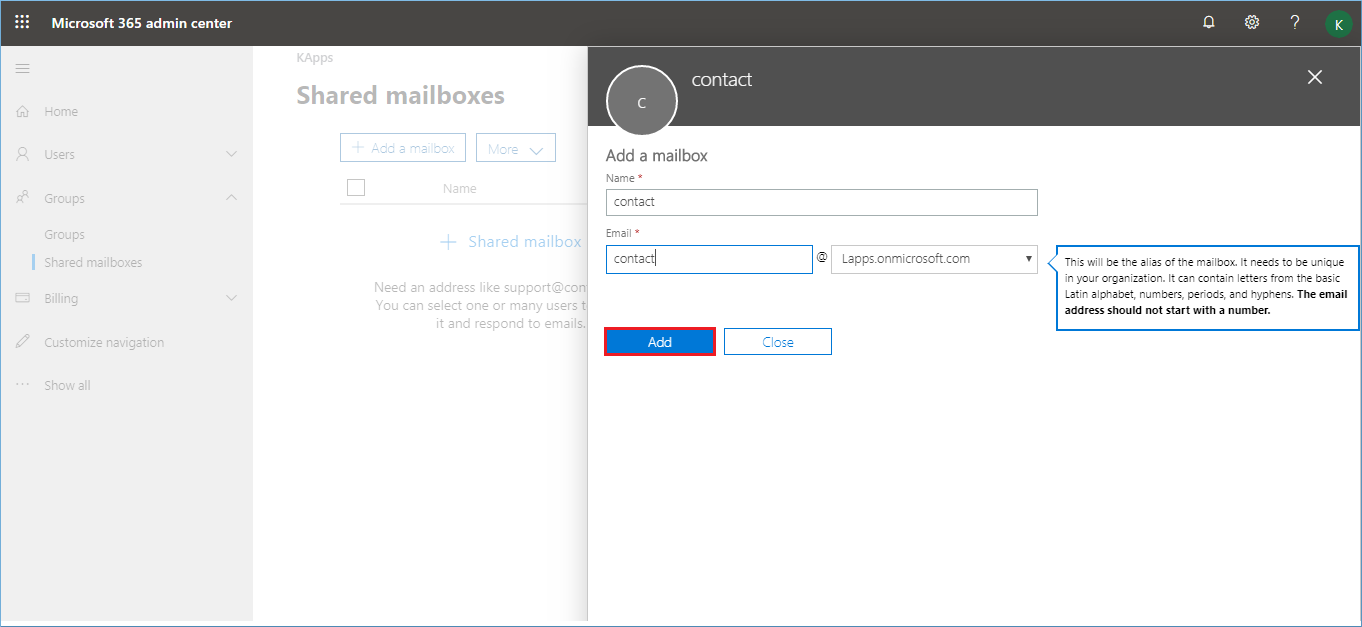
Step 5) A message shows ‘The shared mailbox was created. It may take a few minutes before you can add members.’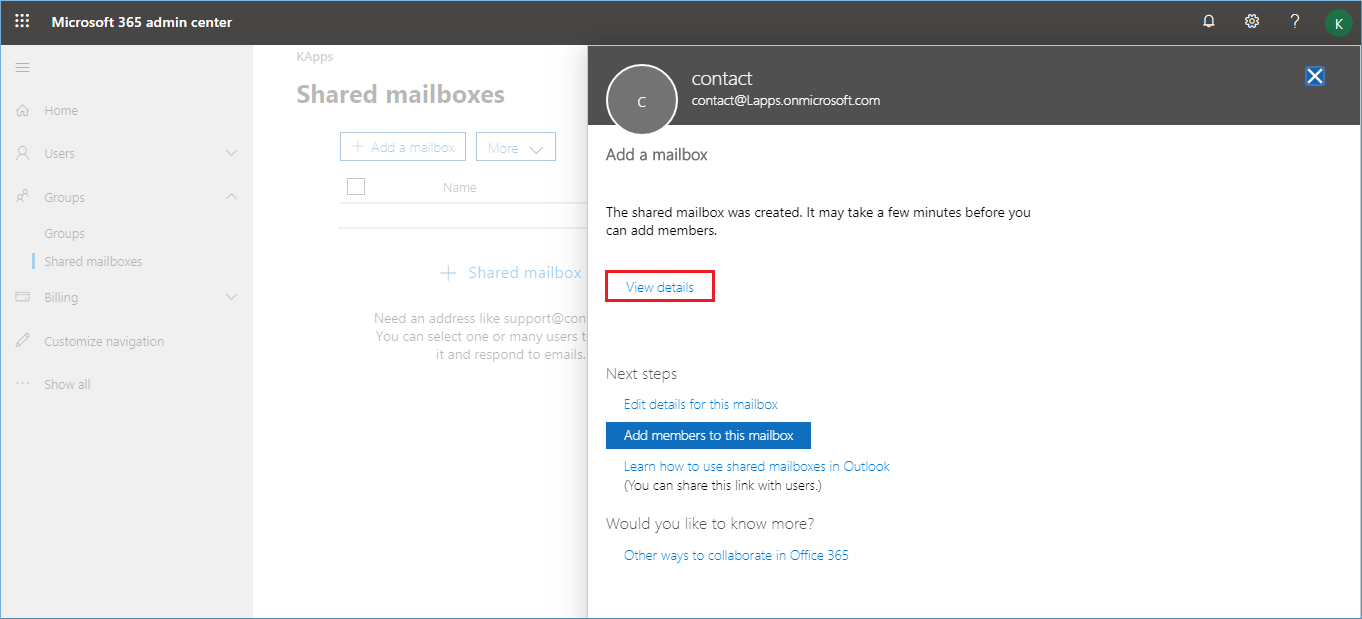
You can click view details to get the information about the shared mailbox.
The properties of the shared mailbox are Name, Email, Email Alias, Email forwarding, automatic replies, sent items, email apps, litigation hold, members, show in global list. You can edit all these properties.
Step 6) To add members, click Edit option.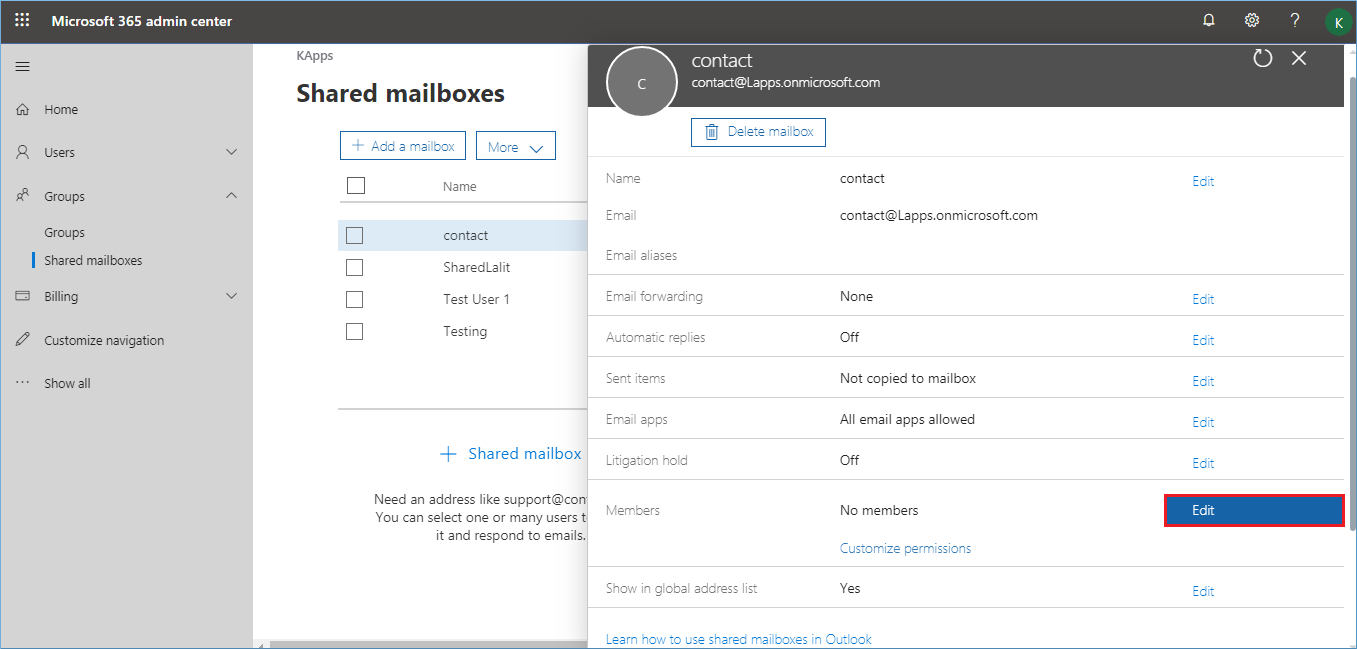
Step 7) Click Add Members button.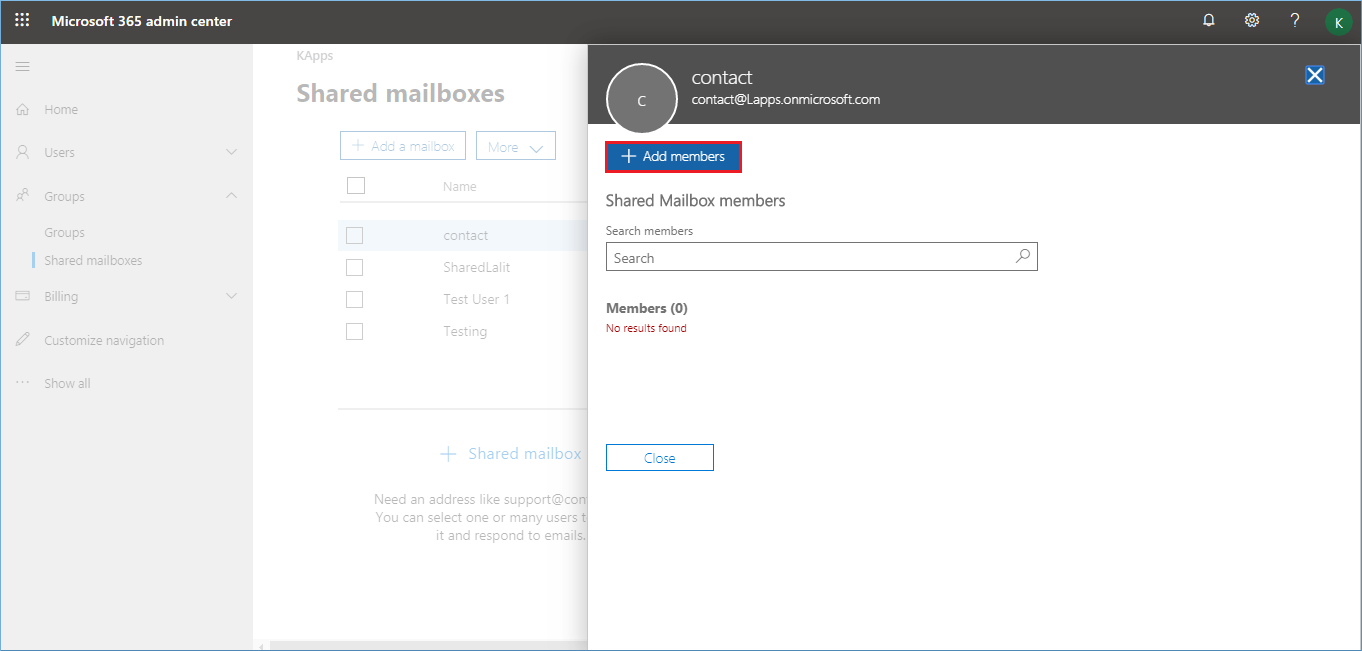
Step 8) Click the check-box before of the user which you want to add in the shared mailbox. Click Save.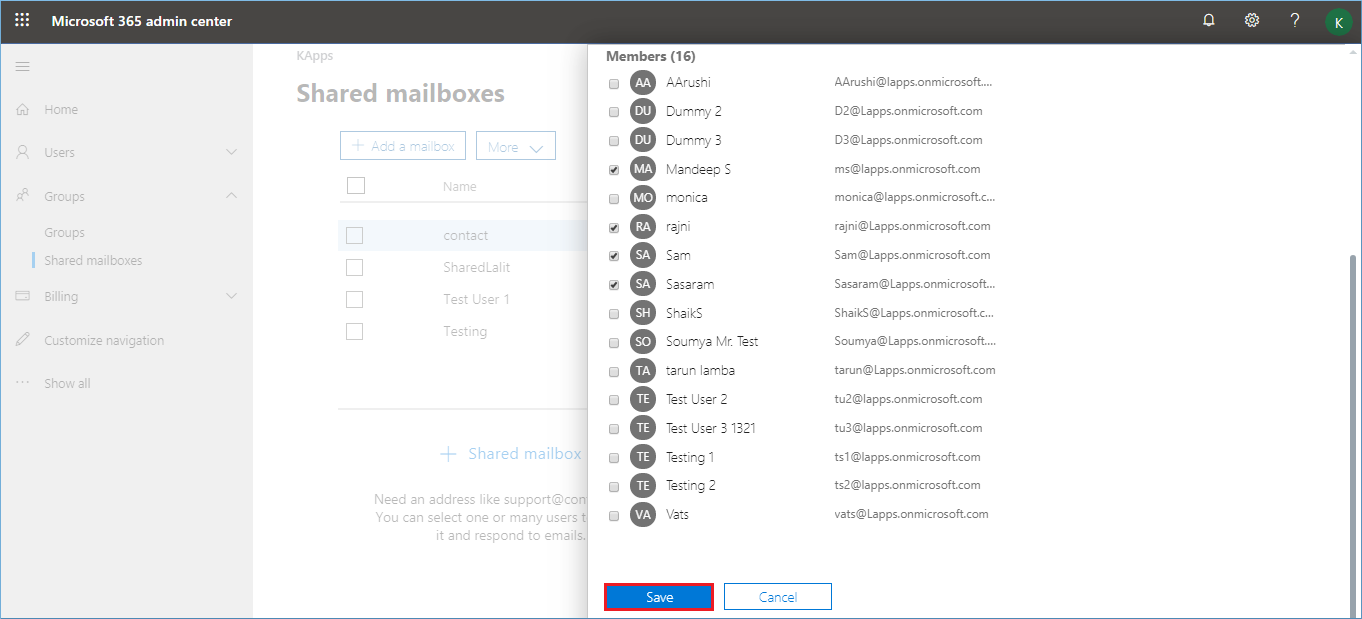
Step 9) A message shows that ‘Shared Mailbox members were successfully updated.’
The message also shows that the changes will appear in the Outlook and OWA within 60 minutes. So, after 60 minutes you can check your Outlook applications and see a new shared mailbox in it.
